Smocking on knits is not traditional, but after reading an article by Nicole Smith in the November 2010 edition of
Threads, I felt that the large grid she had used to apply Counter change or North American smocking to garments made from woven fabric, would be worth a try on the thin knits I had lurking in my stash. Counter change smocking is very simple, requires little equipment, and is very quick in comparison to English or Italian smocking. My rayon jersey smocked t- shirts do not need ironing, and I did not have to finish the edges. Casual smocking is terrific.
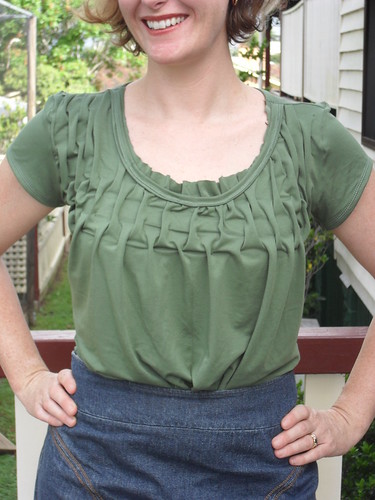
Here is my first attempt, using the Lozenge pattern on a green rayon jersey.
This is the next version, using the Lattice pattern, again on rayon jersey.
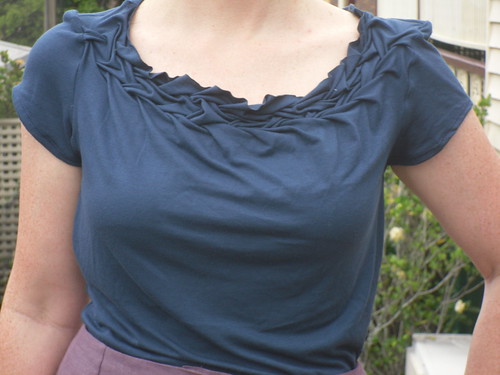
I posted these on my sewing blog, and a few readers suggested that a tutorial would be useful to them. This is the first installment, photographs of how to smock the Lattice pattern on a thin rayon jersey. The smocking, including marking, took approximately 2 hours. (I have been smocking for about 15 years, but the technique is suitable for a beginner, although it might take a bit longer)
I will post another tutorial on how to manage the smocked fabric to make the garments.
Counterchange smocking gathers the fabric without adding elasticity to the gathering. The Lattice pattern gathers the fabric horizontally and vertically. If you are short of fabric, you should smock a sample before committing to the entire garment, and make sure that you will have sufficient once the smocking is completed.The amount your smocked piece will "shrink" depends on the body of the fabric, and the depth of the pleats you make during smocking. Having ample fabric, I did not make a sample. I marked a grid approximately 3x the desired width of my finished smocked piece, and did not cut the fabric before smocking.
I was initally concerned that the smocking might add stiffness to the knit fabric, and smocked the Lozenge pattern (green t shirt), by hand using shirring elastic. However, with wear, I found that the knit fabric retained plenty of stretch, and felt that the use of elastic thread was unnecessary. I used ordinary sewing thread for the blue t-shirt, and in the photographs. I used a crewel needle for the smocking.
I used a one inch grid to mark my fabric. For 2 rows of Lattice smocking, as shown in the blue t-shirt, you need 5 rows of marking. The first row is approximately 3 inches below the edge of the fabric, which allows plenty of trimming room during construction of the garment. I aimed to keep the grid parallel to the selvage of the fabric. All marking and stitching are on the wrong side of the fabric.

Here is a chart for 2 rows of horizontal Lattice smocking as shown in the blue t shirt. Most charts for Lattice smocking are shown with vertical columns.
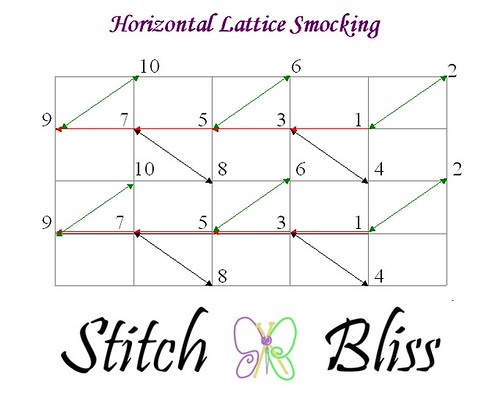
The black diagonal lines are where two points are brought together to form a pleat, and the red lines are where the thread lays slack over the fabric. The inch grid means that these slack stitches are long, and you may wish to take a small stitch half way along the line to minimize catching.
Your first stitch is a holding stitch through the dot marked one. A holding stitch is essentially a back stitch.
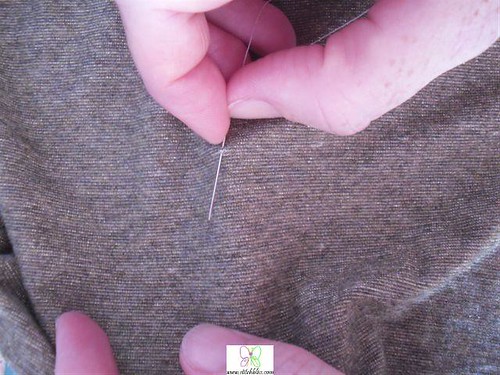
The next stitch is a small stitch through the dot marked 2. This stitch is pulled tight so that 1 and 2 are brought together, pleating the fabric.
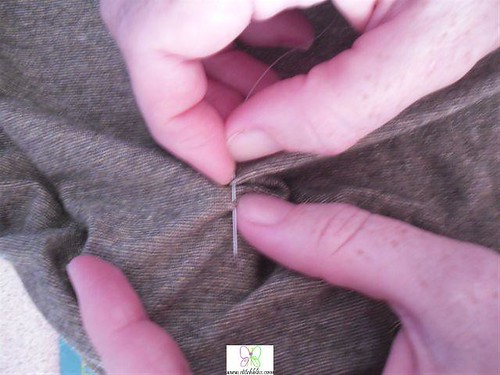
This is sometimes referred to as "Single Stitch". Traditionally, another holding stitch would be made after the single stitch. For the very stretchy knit fabric, I chose to reinforce the holding ability. I took another stitch through these two points, bringing the needle through the loop as I pulled it tight to form a knot.
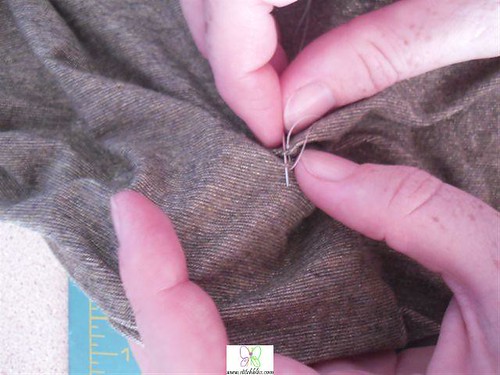
The third stitch is slack. A small stitch is taken through the point marked 3, without gathering or pleating. Again I chose to make this stitch very firm by taking a second back stitch, this time without a knot, as there is less strain on the slack stitches than on the pleating stitches. It is important that the fabric is not stretched as you make the slack stitch.
The fourth stitch is another single stitch, pleating from the dot marked 4, on the other side of the spine of the lattice row.
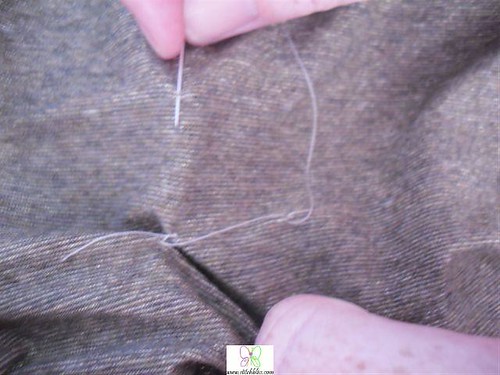
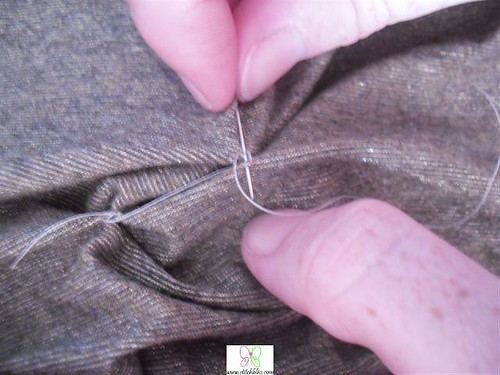
The next stitch is another slack stitch to point number 5.

This is repeated until all of row one is completed.
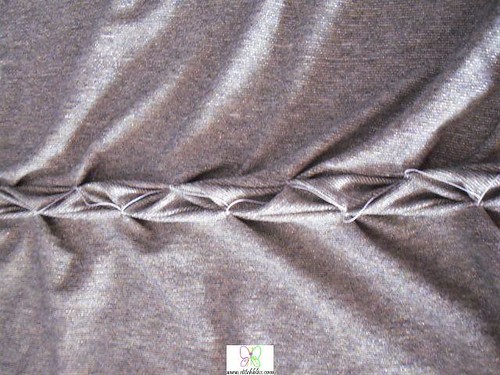
Row 2 is formed in the same manner. The unused dots in the third line of markings from the first row are used in the second row.
Start again at point 1 of the fourth line of markings.
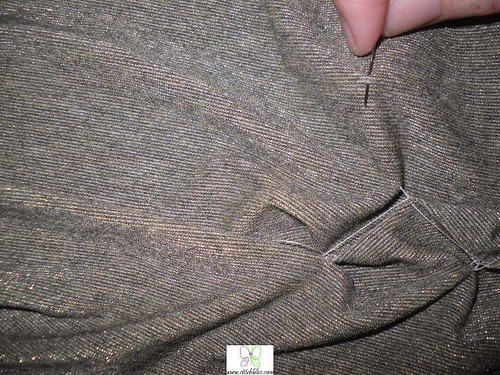
Stitch through point 2 (in the third line of markings) and pleat to point 1
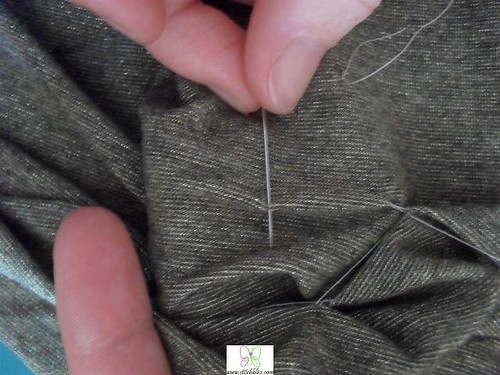
Make a slack stitch to point 3, then stitch through point 4 and pleat to point 3.
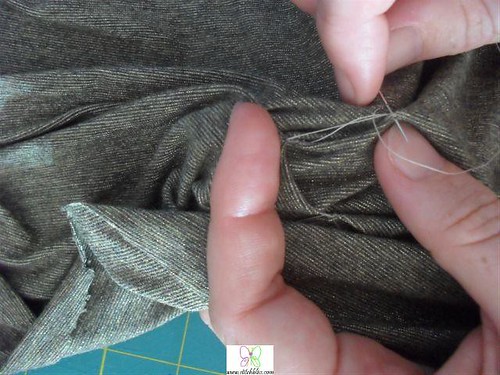
Continue until you reach the end of row 2.

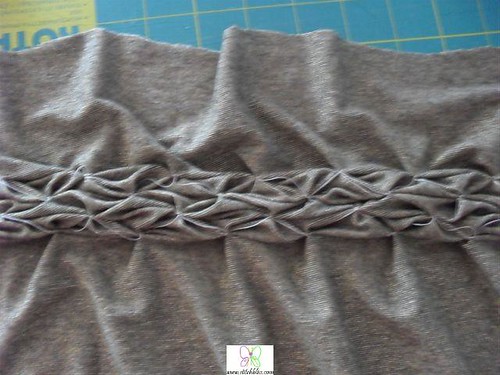
The right side of the fabric shows the lattice pattern.
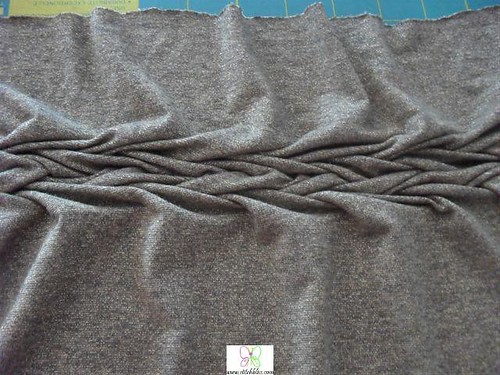
As I am pretty sure only people who really want to try smocking would read through all this dry stuff I am having a give-away. Issue 85 of Australian Smocking and Embroidery has a silk duponi wrap, made using lattice smocking.
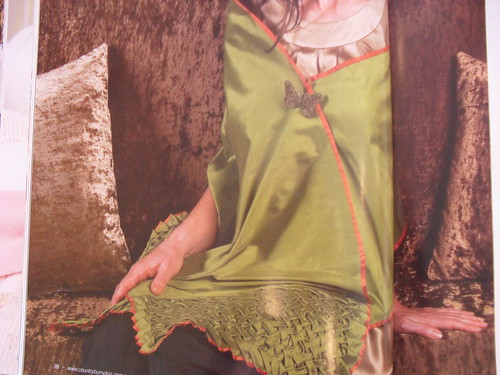

If you would like a copy of this magazine, and are a follower of this blog in google reader, leave a comment stating that you would like to participate in the give away. I will draw names out of a hat next Monday, December 20, and post it to you as soon as I have your snail address.
Happy smocking.
Bibliography
1.Embellishment, by Nicole Smith, article in
Threads November 2010
2.Wrapture, by Nancy McEvoy, article in Australian Smocking and Embroidery Magazine, Issue 85, Country Bumpkin Publications, 2009. pg 39-43.
3.The Art of Manipulating Fabric, by Colette Wolff, Iola, USA, Krasue Publications, 1996.
4. A-Z of Smocking, Country Bumpkin Publications, 2000.
5. Smocks and Smocking, by Beverley Marshall, Alphabooks, England, 1980.
Sources.