I don't think I phrased the giveaway conditions correctly. The people who commented here or on my sewing blog that they would like to try smocking, or would like a copy of issue 85, Australian Smocking and Embroidery magazine, are not followers of this blog, according to the list I can read. Maybe they are private, secret followers?
I have drawn out the names from comments at both blogs anyway, so Kylie, if you would like this magazine, please send your mailing address to mail@stitchbliss.com.

Tuesday, December 21, 2010
Monday, December 13, 2010
Counter change smocking - Lattice pattern on a t-shirt
Smocking on knits is not traditional, but after reading an article by Nicole Smith in the November 2010 edition of Threads, I felt that the large grid she had used to apply Counter change or North American smocking to garments made from woven fabric, would be worth a try on the thin knits I had lurking in my stash. Counter change smocking is very simple, requires little equipment, and is very quick in comparison to English or Italian smocking. My rayon jersey smocked t- shirts do not need ironing, and I did not have to finish the edges. Casual smocking is terrific.
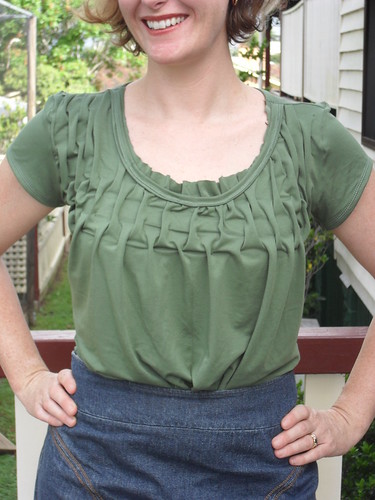
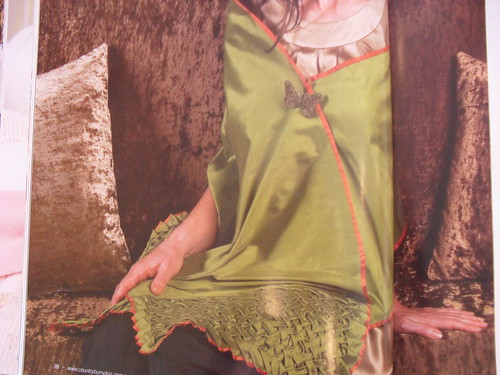
Here is my first attempt, using the Lozenge pattern on a green rayon jersey.
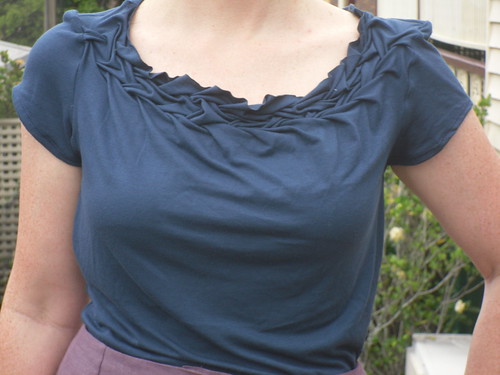
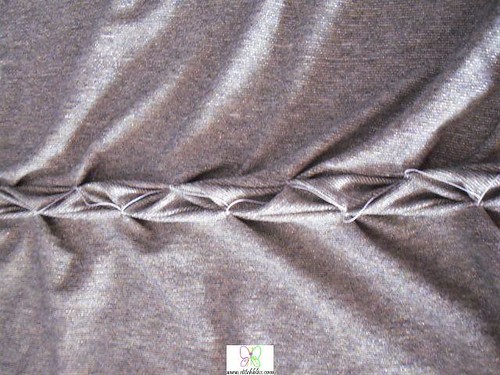
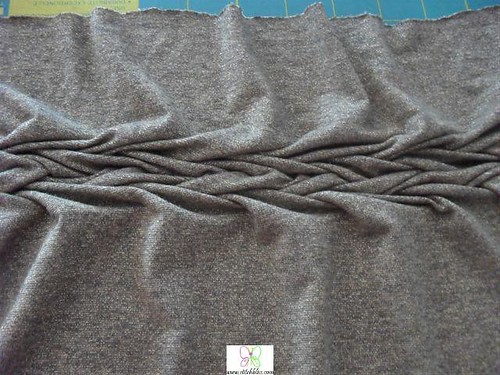
This is the next version, using the Lattice pattern, again on rayon jersey.
I posted these on my sewing blog, and a few readers suggested that a tutorial would be useful to them. This is the first installment, photographs of how to smock the Lattice pattern on a thin rayon jersey. The smocking, including marking, took approximately 2 hours. (I have been smocking for about 15 years, but the technique is suitable for a beginner, although it might take a bit longer)
I will post another tutorial on how to manage the smocked fabric to make the garments.
Counterchange smocking gathers the fabric without adding elasticity to the gathering. The Lattice pattern gathers the fabric horizontally and vertically. If you are short of fabric, you should smock a sample before committing to the entire garment, and make sure that you will have sufficient once the smocking is completed.The amount your smocked piece will "shrink" depends on the body of the fabric, and the depth of the pleats you make during smocking. Having ample fabric, I did not make a sample. I marked a grid approximately 3x the desired width of my finished smocked piece, and did not cut the fabric before smocking.
I was initally concerned that the smocking might add stiffness to the knit fabric, and smocked the Lozenge pattern (green t shirt), by hand using shirring elastic. However, with wear, I found that the knit fabric retained plenty of stretch, and felt that the use of elastic thread was unnecessary. I used ordinary sewing thread for the blue t-shirt, and in the photographs. I used a crewel needle for the smocking.
I used a one inch grid to mark my fabric. For 2 rows of Lattice smocking, as shown in the blue t-shirt, you need 5 rows of marking. The first row is approximately 3 inches below the edge of the fabric, which allows plenty of trimming room during construction of the garment. I aimed to keep the grid parallel to the selvage of the fabric. All marking and stitching are on the wrong side of the fabric.

Here is a chart for 2 rows of horizontal Lattice smocking as shown in the blue t shirt. Most charts for Lattice smocking are shown with vertical columns.
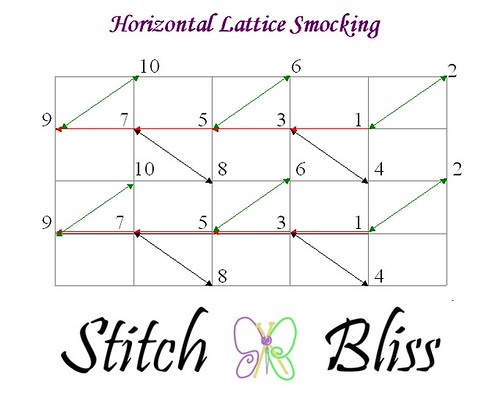
The black diagonal lines are where two points are brought together to form a pleat, and the red lines are where the thread lays slack over the fabric. The inch grid means that these slack stitches are long, and you may wish to take a small stitch half way along the line to minimize catching.
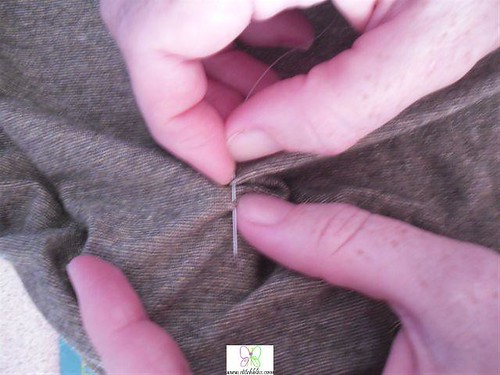
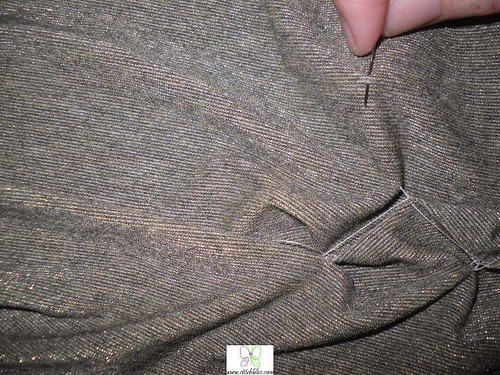
Your first stitch is a holding stitch through the dot marked one. A holding stitch is essentially a back stitch.
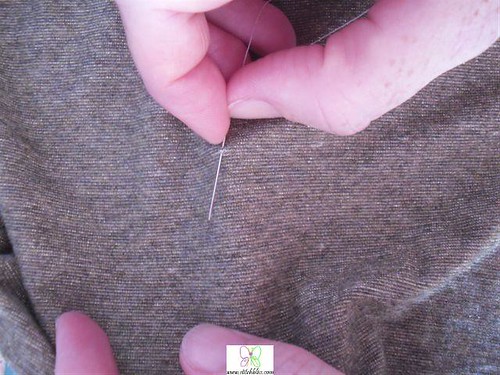
The next stitch is a small stitch through the dot marked 2. This stitch is pulled tight so that 1 and 2 are brought together, pleating the fabric.
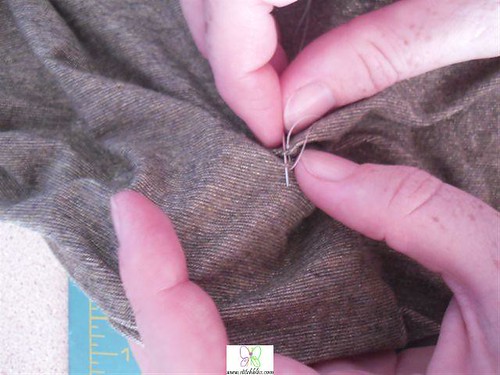
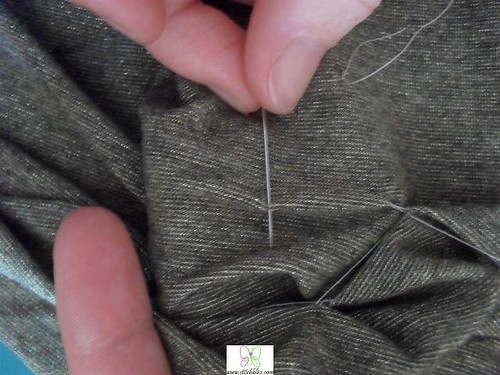
This is sometimes referred to as "Single Stitch". Traditionally, another holding stitch would be made after the single stitch. For the very stretchy knit fabric, I chose to reinforce the holding ability. I took another stitch through these two points, bringing the needle through the loop as I pulled it tight to form a knot.
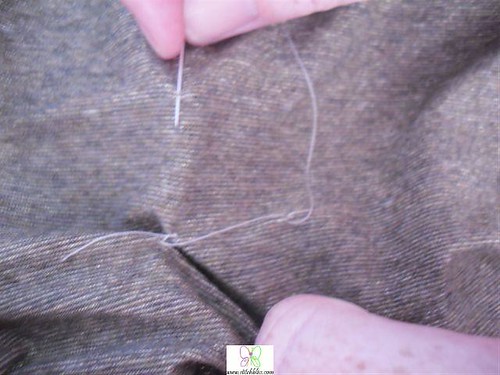
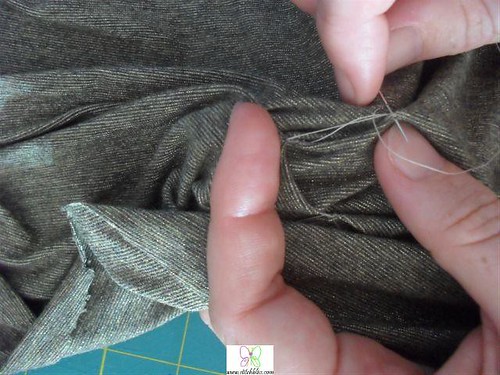
The third stitch is slack. A small stitch is taken through the point marked 3, without gathering or pleating. Again I chose to make this stitch very firm by taking a second back stitch, this time without a knot, as there is less strain on the slack stitches than on the pleating stitches. It is important that the fabric is not stretched as you make the slack stitch.
The fourth stitch is another single stitch, pleating from the dot marked 4, on the other side of the spine of the lattice row.
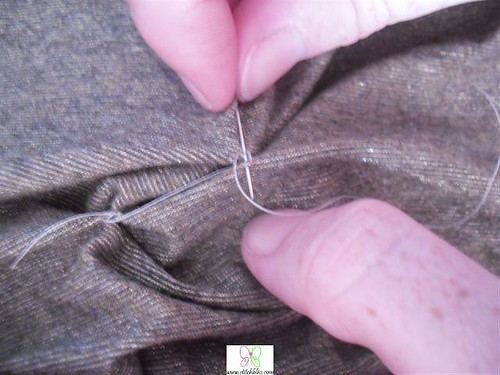
The next stitch is another slack stitch to point number 5.

This is repeated until all of row one is completed.
Row 2 is formed in the same manner. The unused dots in the third line of markings from the first row are used in the second row.
Start again at point 1 of the fourth line of markings.
Stitch through point 2 (in the third line of markings) and pleat to point 1
Make a slack stitch to point 3, then stitch through point 4 and pleat to point 3.
Continue until you reach the end of row 2.

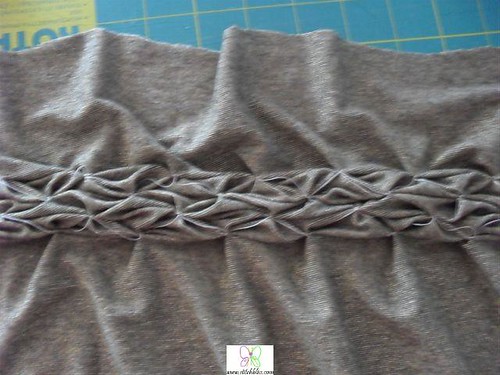
The right side of the fabric shows the lattice pattern.
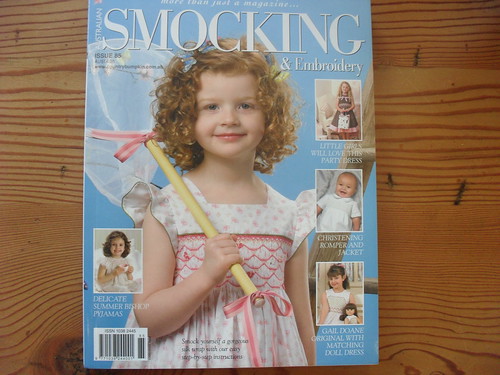
As I am pretty sure only people who really want to try smocking would read through all this dry stuff I am having a give-away. Issue 85 of Australian Smocking and Embroidery has a silk duponi wrap, made using lattice smocking.
If you would like a copy of this magazine, and are a follower of this blog in google reader, leave a comment stating that you would like to participate in the give away. I will draw names out of a hat next Monday, December 20, and post it to you as soon as I have your snail address.
Happy smocking.
Bibliography
1.Embellishment, by Nicole Smith, article in Threads November 2010
2.Wrapture, by Nancy McEvoy, article in Australian Smocking and Embroidery Magazine, Issue 85, Country Bumpkin Publications, 2009. pg 39-43.
3.The Art of Manipulating Fabric, by Colette Wolff, Iola, USA, Krasue Publications, 1996.
4. A-Z of Smocking, Country Bumpkin Publications, 2000.
5. Smocks and Smocking, by Beverley Marshall, Alphabooks, England, 1980.
Sources.
Here is my first attempt, using the Lozenge pattern on a green rayon jersey.
This is the next version, using the Lattice pattern, again on rayon jersey.
I posted these on my sewing blog, and a few readers suggested that a tutorial would be useful to them. This is the first installment, photographs of how to smock the Lattice pattern on a thin rayon jersey. The smocking, including marking, took approximately 2 hours. (I have been smocking for about 15 years, but the technique is suitable for a beginner, although it might take a bit longer)
I will post another tutorial on how to manage the smocked fabric to make the garments.
Counterchange smocking gathers the fabric without adding elasticity to the gathering. The Lattice pattern gathers the fabric horizontally and vertically. If you are short of fabric, you should smock a sample before committing to the entire garment, and make sure that you will have sufficient once the smocking is completed.The amount your smocked piece will "shrink" depends on the body of the fabric, and the depth of the pleats you make during smocking. Having ample fabric, I did not make a sample. I marked a grid approximately 3x the desired width of my finished smocked piece, and did not cut the fabric before smocking.
I was initally concerned that the smocking might add stiffness to the knit fabric, and smocked the Lozenge pattern (green t shirt), by hand using shirring elastic. However, with wear, I found that the knit fabric retained plenty of stretch, and felt that the use of elastic thread was unnecessary. I used ordinary sewing thread for the blue t-shirt, and in the photographs. I used a crewel needle for the smocking.
I used a one inch grid to mark my fabric. For 2 rows of Lattice smocking, as shown in the blue t-shirt, you need 5 rows of marking. The first row is approximately 3 inches below the edge of the fabric, which allows plenty of trimming room during construction of the garment. I aimed to keep the grid parallel to the selvage of the fabric. All marking and stitching are on the wrong side of the fabric.
Here is a chart for 2 rows of horizontal Lattice smocking as shown in the blue t shirt. Most charts for Lattice smocking are shown with vertical columns.
The black diagonal lines are where two points are brought together to form a pleat, and the red lines are where the thread lays slack over the fabric. The inch grid means that these slack stitches are long, and you may wish to take a small stitch half way along the line to minimize catching.
Your first stitch is a holding stitch through the dot marked one. A holding stitch is essentially a back stitch.
The next stitch is a small stitch through the dot marked 2. This stitch is pulled tight so that 1 and 2 are brought together, pleating the fabric.
This is sometimes referred to as "Single Stitch". Traditionally, another holding stitch would be made after the single stitch. For the very stretchy knit fabric, I chose to reinforce the holding ability. I took another stitch through these two points, bringing the needle through the loop as I pulled it tight to form a knot.
The third stitch is slack. A small stitch is taken through the point marked 3, without gathering or pleating. Again I chose to make this stitch very firm by taking a second back stitch, this time without a knot, as there is less strain on the slack stitches than on the pleating stitches. It is important that the fabric is not stretched as you make the slack stitch.
The fourth stitch is another single stitch, pleating from the dot marked 4, on the other side of the spine of the lattice row.
The next stitch is another slack stitch to point number 5.
This is repeated until all of row one is completed.
Row 2 is formed in the same manner. The unused dots in the third line of markings from the first row are used in the second row.
Start again at point 1 of the fourth line of markings.
Stitch through point 2 (in the third line of markings) and pleat to point 1
Make a slack stitch to point 3, then stitch through point 4 and pleat to point 3.
Continue until you reach the end of row 2.
The right side of the fabric shows the lattice pattern.
As I am pretty sure only people who really want to try smocking would read through all this dry stuff I am having a give-away. Issue 85 of Australian Smocking and Embroidery has a silk duponi wrap, made using lattice smocking.
If you would like a copy of this magazine, and are a follower of this blog in google reader, leave a comment stating that you would like to participate in the give away. I will draw names out of a hat next Monday, December 20, and post it to you as soon as I have your snail address.
Happy smocking.
Bibliography
1.Embellishment, by Nicole Smith, article in Threads November 2010
2.Wrapture, by Nancy McEvoy, article in Australian Smocking and Embroidery Magazine, Issue 85, Country Bumpkin Publications, 2009. pg 39-43.
3.The Art of Manipulating Fabric, by Colette Wolff, Iola, USA, Krasue Publications, 1996.
4. A-Z of Smocking, Country Bumpkin Publications, 2000.
5. Smocks and Smocking, by Beverley Marshall, Alphabooks, England, 1980.
Sources.
Wednesday, November 17, 2010
Cross cultral knitting for boys - a pitfall
I am sure that most knitters have run up against the boy-clothing dilemma of intense conservatism combined with extreme pickiness.
Sharon wisely had the designated recipient look at the pattern books, and select his own yarn.
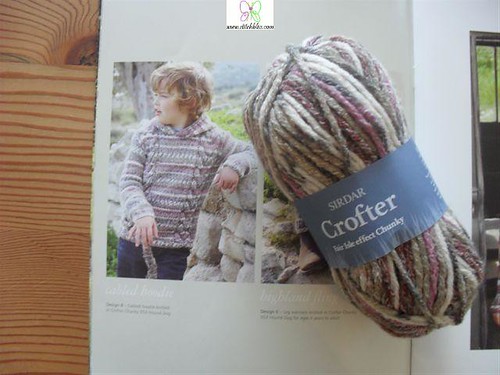
Having the common non-knitter difficulty in imagining a particular pattern made up in a different yarn, the boy chose Sirdar Crofter Chunky 0053, Hound Dog, to make the cabled hoodie, Design B, from Sirdar Book 362, Crofter Chunky. There is a very nice photograph of a boy wearing this hoodie, in this yarn in the pattern book.

Sharon is a very experienced knitter, and likes to knit in the round, so she started off this pattern from the bottom, knitting the back and the front at once. Unfortunately, she had not remembered that the pattern repeat for the fair isle effect has been worked out for the pattern as written - when knit across the front and the back at once, the fair isle effect was lost, so she had to rip it. Annoying.
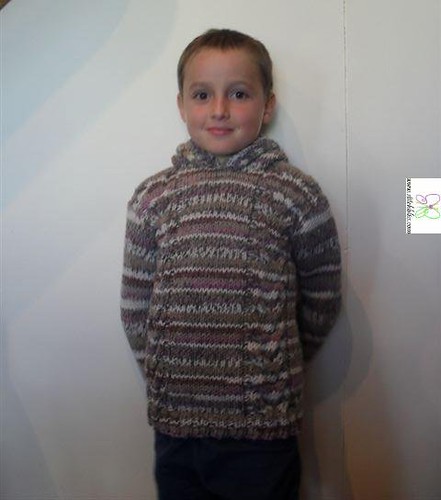
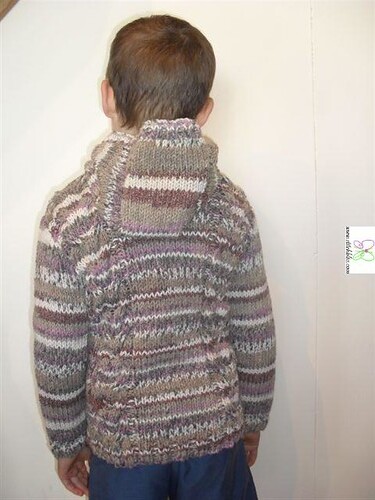
Fortunately, making a size 61/66 chest jumper, using Chunky yarn, is quick. This did not take Sharon long to knit, even with the hood.
Unfortunately, the boy took one look at the finished hoodie, and said "There's pink in it!" (you will have to imagine the tone of deep disgust). He must have missed the very small amount of pinkish red visible in both the photograph, and the yarn in its ball. He insisted that the jumper be given to his (female) cousin instead.
However, after he reluctantly agreed to model it to check the fit, he asked for one just the same - in a different colour.
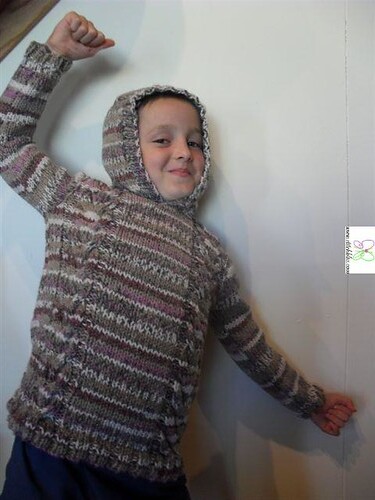
The next one had better be plain navy blue.
Maybe he should knit it himself.
Sharon wisely had the designated recipient look at the pattern books, and select his own yarn.
Having the common non-knitter difficulty in imagining a particular pattern made up in a different yarn, the boy chose Sirdar Crofter Chunky 0053, Hound Dog, to make the cabled hoodie, Design B, from Sirdar Book 362, Crofter Chunky. There is a very nice photograph of a boy wearing this hoodie, in this yarn in the pattern book.
Sharon is a very experienced knitter, and likes to knit in the round, so she started off this pattern from the bottom, knitting the back and the front at once. Unfortunately, she had not remembered that the pattern repeat for the fair isle effect has been worked out for the pattern as written - when knit across the front and the back at once, the fair isle effect was lost, so she had to rip it. Annoying.
Fortunately, making a size 61/66 chest jumper, using Chunky yarn, is quick. This did not take Sharon long to knit, even with the hood.
Unfortunately, the boy took one look at the finished hoodie, and said "There's pink in it!" (you will have to imagine the tone of deep disgust). He must have missed the very small amount of pinkish red visible in both the photograph, and the yarn in its ball. He insisted that the jumper be given to his (female) cousin instead.
However, after he reluctantly agreed to model it to check the fit, he asked for one just the same - in a different colour.
The next one had better be plain navy blue.
Maybe he should knit it himself.
Saturday, November 13, 2010
Baby Bamboo 370 , Happy Little Stripes
The next Christmas gift completed is a cardigan for a 6 year old niece. I have used the pattern Stripey caridgan B, from Sirdar 370, Little Stripes and Brights, making a size 6-7.
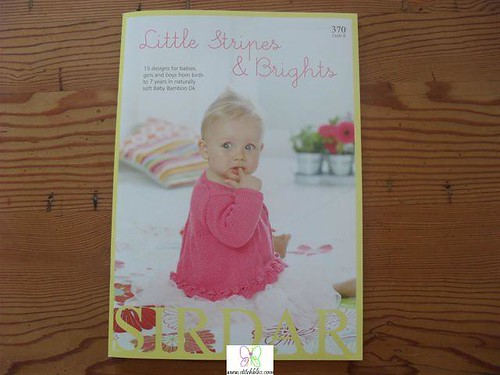

I used the same colours of Baby Bamboo as the last cardigan, as this present is for the older sister of the previous niece, and I think it is pretty to have a common theme in sibling clothing for occasional use.
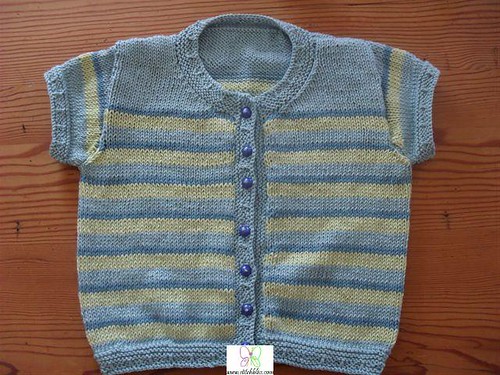
The finished cardigan looks quite plain, but I am happy with this appearance. I think my niece will be able to wear this cardigan with a dress, or jeans, and this will give her more use from the garment.
In the pattern, there is a knitted flower attached to the cardigan. I have made this flower, but cannot take a photograph of it today, as the camera battery has inconveniently gone flat. I have made a pony tail ornament with the flower, and will make another few as brooches, so that the cardigan can be dressed up or down.
I used the same colours of Baby Bamboo as the last cardigan, as this present is for the older sister of the previous niece, and I think it is pretty to have a common theme in sibling clothing for occasional use.
The finished cardigan looks quite plain, but I am happy with this appearance. I think my niece will be able to wear this cardigan with a dress, or jeans, and this will give her more use from the garment.
In the pattern, there is a knitted flower attached to the cardigan. I have made this flower, but cannot take a photograph of it today, as the camera battery has inconveniently gone flat. I have made a pony tail ornament with the flower, and will make another few as brooches, so that the cardigan can be dressed up or down.
Monday, November 8, 2010
Sirdar Baby Bamboo Ruffly Bolero
I want to write a few posts about my Christmas Present knitting. Every year, I try to have a few things knitted well in advance, but I always knit presents through November and December.
This year, I am hoping to knit a few summer cardigans for as many of my 8 nieces as time allows. Here is the first cab off the rank.
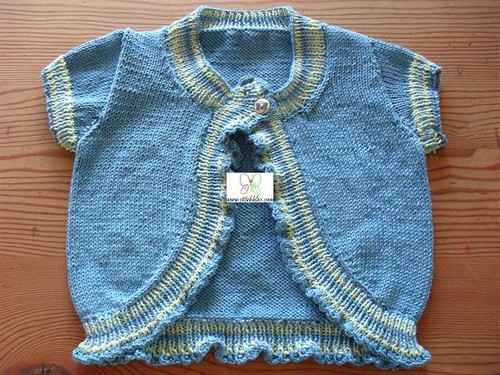
This cardigan is from Sirdar book 352, Seaside Babies.
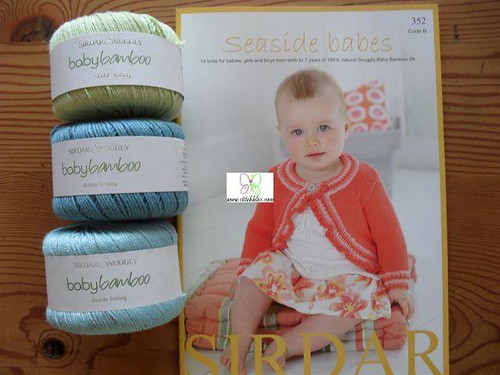
I have knit a short sleeved version of the Ruffle trimmed bolero pictured on the front cover. I have deviated only slightly from the pattern, making a size 4-5 for a 5 year old niece, using stripes in the ruffle and sleeves of the short sleeved version, and choosing blues and greens (133 Willow, 138 Waterbaby and 143 Playful) in the Baby Bamboo DK.
This is a very quick knit, just right for whiling away the time whilst spectating at cricket practice. This is just as well, as there are 7 niece garments to go - and my mother wants a glamorous scarf to wear in the evening....
This year, I am hoping to knit a few summer cardigans for as many of my 8 nieces as time allows. Here is the first cab off the rank.
This cardigan is from Sirdar book 352, Seaside Babies.
I have knit a short sleeved version of the Ruffle trimmed bolero pictured on the front cover. I have deviated only slightly from the pattern, making a size 4-5 for a 5 year old niece, using stripes in the ruffle and sleeves of the short sleeved version, and choosing blues and greens (133 Willow, 138 Waterbaby and 143 Playful) in the Baby Bamboo DK.
This is a very quick knit, just right for whiling away the time whilst spectating at cricket practice. This is just as well, as there are 7 niece garments to go - and my mother wants a glamorous scarf to wear in the evening....
Friday, November 5, 2010
Knit 8 Side to side cardigan, version 2
Today I have asked Hannah to write a guest post about the cardigan she has just finished. Hannah has been knitting for 2 years, and is working in the shop part time.
Pattern description:
The pattern I used is the side to side cardigan, from Knit 8. I made Version 2.
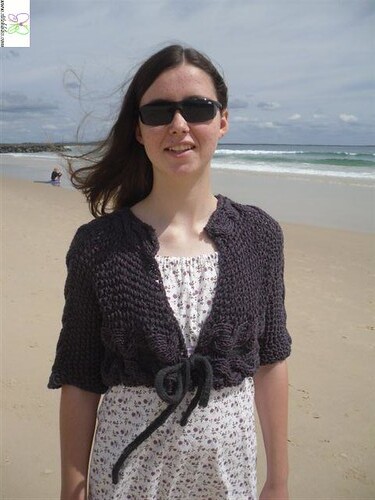
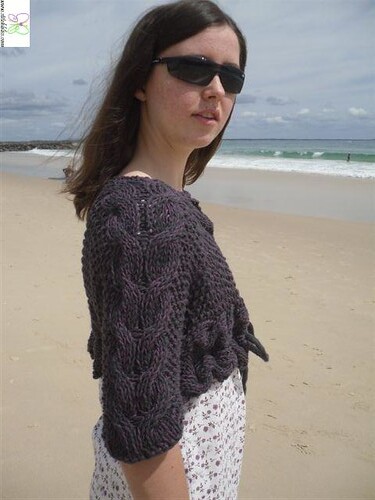
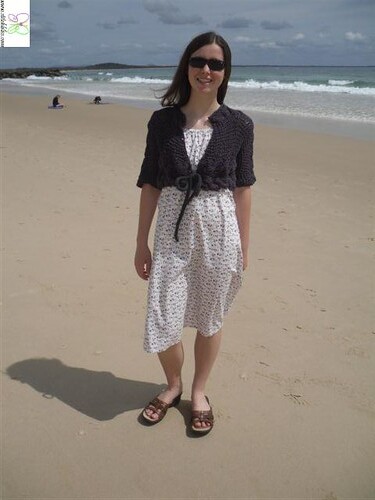
This pattern is for a short, sideways knitted cardigan with three cables. The cardigan ties with an eye cord that runs through one of the cables.

Why did you chose this pattern? Did the finished garment turn out as you expected?
I chose the cardigan pattern because it looked fun and quick to knit and had quite a few techniques that I hadn't used before. When I finished the cardigan it looked exactly like the picture in Knit 8, but with different colours and a longer i-cord, which were my changes.
Did you find any errors or tricky places in the pattern?
Right at the end of the pattern there was one minor error, the knits were called purls and the purls were called knits, but I found it before I knitted that section, thank goodness. :)
What yarns and needles did you use? Did you like the yarn texture and colour? Did the yarns work well for the pattern?:
For the cardigan I used Alpaca Silk Georgette 751 Pebble and Soho Summer DK Cotton 234 Currant. I used Currant instead of Soho Summer DK Cotton 216 Sapote, which is the yarn used in the pattern instructions, because I preferred the colour combination of purple and steel grey to the suggested brown and steel grey, which seemed a bit dull to me. The needles I used were 5.5mm and 10.0mm single pointed needles, a cable needle, a stitch holder and 5.5mm double pointed needles.
The two yarns together feel soft and make the pattern look slightly lacy, because they're knitted together on large needles. The two yarns worked really well for the cardigan, I love the combined colours and the yarns feel very soft. The cardigan is also a perfect weight for Queensland, it gives some warmth but isn't too hot, because of its lacy texture.
How long did it take you to knit the garment:
I knitted the cardigan on and off for about 2 months, not doing much knitting each time. The actual knitting was very quick though, and sewing up barely took any time at all. Probably the most time consuming part of the cardigan was knitting the i-cord.
Was it a difficult knit for you? Did you use any new techniques?:
This wasn't a very difficult cardigan to make, the instructions were quite easy to read and follow, even though there were a few techniques I hadn't really used much before, like the moss stitch and the whole experience of knitting "sideways." The instructions for the i-cord weren't as clear but I found very user-friendly instructions for it in Knitter's Handbook by Montse Stanley
Are you happy with the garment? Where and when are you planning to wear it?
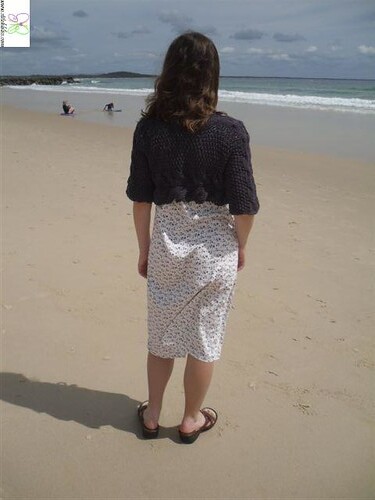
I am very happy with the cardigan, it turned out almost exactly like I thought it would, and I think it is very flattering to wear. I plan to wear the cardigan in spring, autumn and maybe on warmer winter days. So far I've worn it with a dress during a breezy day at the beach and at work over a blouse, with a skirt. I am really satisfied with the cardigan, hopefully I'll be able to wear it a lot. I think it will dress up a jeans outfit, or look smart and casual over a more formal outfit.
Pattern description:
The pattern I used is the side to side cardigan, from Knit 8. I made Version 2.
This pattern is for a short, sideways knitted cardigan with three cables. The cardigan ties with an eye cord that runs through one of the cables.
Why did you chose this pattern? Did the finished garment turn out as you expected?
I chose the cardigan pattern because it looked fun and quick to knit and had quite a few techniques that I hadn't used before. When I finished the cardigan it looked exactly like the picture in Knit 8, but with different colours and a longer i-cord, which were my changes.
Did you find any errors or tricky places in the pattern?
Right at the end of the pattern there was one minor error, the knits were called purls and the purls were called knits, but I found it before I knitted that section, thank goodness. :)
What yarns and needles did you use? Did you like the yarn texture and colour? Did the yarns work well for the pattern?:
For the cardigan I used Alpaca Silk Georgette 751 Pebble and Soho Summer DK Cotton 234 Currant. I used Currant instead of Soho Summer DK Cotton 216 Sapote, which is the yarn used in the pattern instructions, because I preferred the colour combination of purple and steel grey to the suggested brown and steel grey, which seemed a bit dull to me. The needles I used were 5.5mm and 10.0mm single pointed needles, a cable needle, a stitch holder and 5.5mm double pointed needles.
The two yarns together feel soft and make the pattern look slightly lacy, because they're knitted together on large needles. The two yarns worked really well for the cardigan, I love the combined colours and the yarns feel very soft. The cardigan is also a perfect weight for Queensland, it gives some warmth but isn't too hot, because of its lacy texture.
How long did it take you to knit the garment:
I knitted the cardigan on and off for about 2 months, not doing much knitting each time. The actual knitting was very quick though, and sewing up barely took any time at all. Probably the most time consuming part of the cardigan was knitting the i-cord.
Was it a difficult knit for you? Did you use any new techniques?:
This wasn't a very difficult cardigan to make, the instructions were quite easy to read and follow, even though there were a few techniques I hadn't really used much before, like the moss stitch and the whole experience of knitting "sideways." The instructions for the i-cord weren't as clear but I found very user-friendly instructions for it in Knitter's Handbook by Montse Stanley
Are you happy with the garment? Where and when are you planning to wear it?
I am very happy with the cardigan, it turned out almost exactly like I thought it would, and I think it is very flattering to wear. I plan to wear the cardigan in spring, autumn and maybe on warmer winter days. So far I've worn it with a dress during a breezy day at the beach and at work over a blouse, with a skirt. I am really satisfied with the cardigan, hopefully I'll be able to wear it a lot. I think it will dress up a jeans outfit, or look smart and casual over a more formal outfit.
Monday, November 1, 2010
Knit 4 sweater, Enid's version
There are few things more useful in a winter wardrobe than a classic cream jumper. Enid had a old favourite that had been worn to death, and needed to replace it. She chose the gorgeously soft and fine Alpaca Silk Georgette yarn with which to make her jumper, then spent quite some time considering the many patterns available.
Her choice was one of the jumpers from Knit 4.

This pattern book has several jumper options, and several cardigan options for Alpaca Silk Georgette, Enid's is a combination of sweater version 1 and sweater version 2 - Enid has knitted a medium length for the body, and altered the neck to fall between the high and crew styles. She has also chosen to double over the rib neck, for a more robust and clean looking finish.

Enid generally liked the pattern, but felt that there was a nasty error in the shoulder section. She had to increase the length of the shoulders by approximately 10 cm further than the pattern described. Fortunately, she had no difficulty with the relatively small amount of reverse knitting that was needed.
The final jumper is a great success, and will undoubtedly be loved to death, just like the first classic cream jumper. Using a fine yarn for a jumper gives a good fit without excess bulk.

Her choice was one of the jumpers from Knit 4.
This pattern book has several jumper options, and several cardigan options for Alpaca Silk Georgette, Enid's is a combination of sweater version 1 and sweater version 2 - Enid has knitted a medium length for the body, and altered the neck to fall between the high and crew styles. She has also chosen to double over the rib neck, for a more robust and clean looking finish.
Enid generally liked the pattern, but felt that there was a nasty error in the shoulder section. She had to increase the length of the shoulders by approximately 10 cm further than the pattern described. Fortunately, she had no difficulty with the relatively small amount of reverse knitting that was needed.
The final jumper is a great success, and will undoubtedly be loved to death, just like the first classic cream jumper. Using a fine yarn for a jumper gives a good fit without excess bulk.
Subscribe to:
Posts (Atom)